Instructions:
- Marinate the Chicken:
In a large bowl, whisk together the buttermilk and hot sauce (if using). Add the chicken pieces and ensure they are fully coated. Cover the bowl and refrigerate for at least 2 hours, or overnight for maximum flavor and tenderness. - Prepare for Baking:
Preheat your oven to 400°F (200°C). Line a baking sheet with foil and place a wire rack on top. Lightly grease the rack with cooking spray or brush with oil to prevent sticking. - Make the Seasoned Coating:
In a shallow dish or bowl, combine the flour, cornstarch, paprika, garlic powder, onion powder, oregano, thyme, cayenne (if using), salt, and black pepper. Mix thoroughly to evenly distribute the seasonings. - Coat the Chicken:
Remove each piece of chicken from the marinade, allowing any excess to drip off. Dredge it thoroughly in the seasoned flour mixture, pressing to ensure the coating adheres well. For extra crunch, let the coated pieces rest for 10 minutes before baking. - Bake the Chicken:
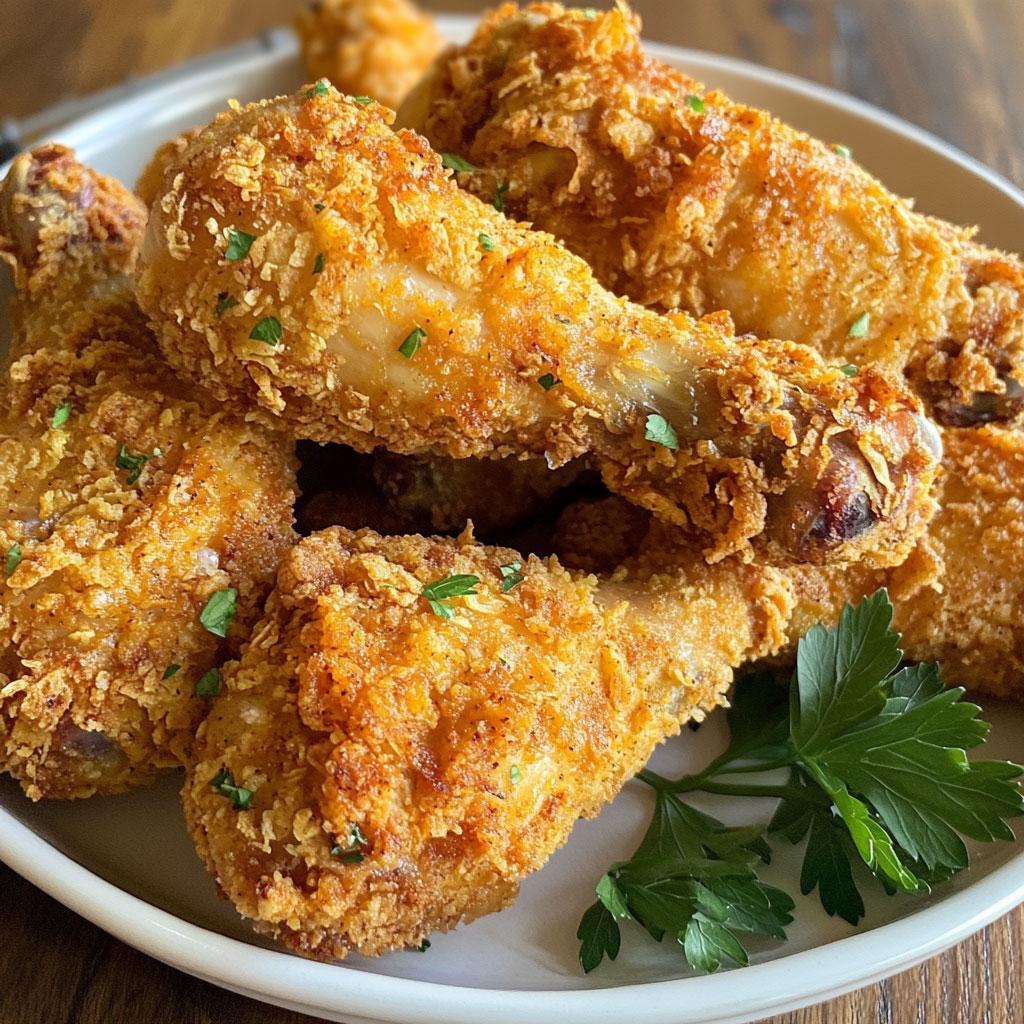
Arrange the coated chicken pieces on the prepared wire rack. Spray them generously with cooking oil to promote crisping in the oven. Bake for 45–55 minutes, turning the pieces halfway through for even browning. The chicken is done when the crust is golden and the internal temperature reaches 165°F (74°C). - Rest and Serve:
Let the baked chicken rest for about 5 minutes after removing from the oven. This helps the juices redistribute and allows the coating to set further before serving.
Variations :
- Spicy Lovers: Add extra cayenne or a pinch of chili flakes to the flour mix for more heat.
- Kid-Friendly: Skip the cayenne and hot sauce entirely for a milder, family-friendly version.
- Boneless Option: Use boneless thighs or chicken tenders—adjust baking time to 25–30 minutes depending on size.
- Air Fryer Method: Cook at 375°F for 25–30 minutes, flipping once halfway through. Spray with oil for a crispier texture.
- Gluten-Free Version: Use gluten-free all-purpose flour and ensure spices are certified gluten-free.
Tips :
- Marination is Key: Don’t skip the buttermilk soak—it’s essential for tender, juicy meat and helps the coating adhere.
- Rest Before Baking: Allow the coated chicken to sit for 10–15 minutes before baking. This helps form a better crust.
- Use a Rack: Elevating the chicken promotes even cooking and prevents soggy bottoms.
- Oil Matters: Spraying oil generously ensures a golden, crunchy exterior without frying.
- Storage: Store leftovers in the fridge and reheat in a 375°F oven for 10–15 minutes to re-crisp the coating.
ADVERTISEMENT
Enjoy this better-for-you take on a fast-food favorite—made entirely in your home kitchen with classic flavor and a healthier twist.